Crochet Bear Hat Pattern

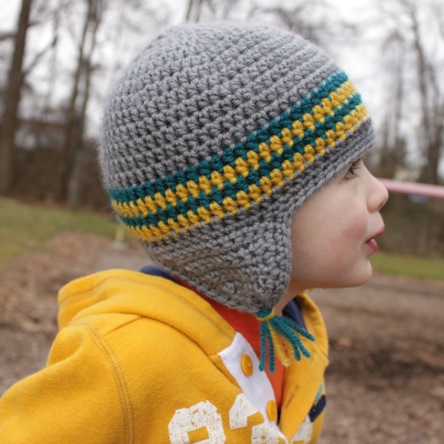
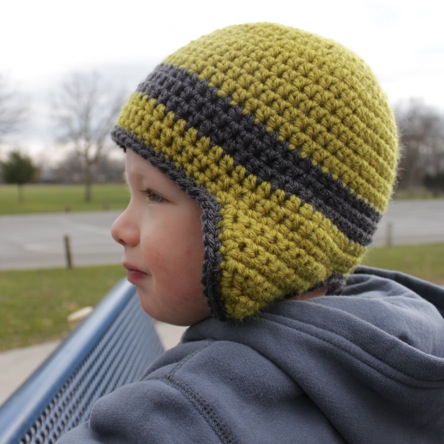
The kids and I haven’t been feeling our best this week, so we decided to make another animal hat to bring some smiles to our faces. I don’t think too many people could resist smiling when faced with an adorable kid in an adorable hat. Snuggling with this teddy bear sure made me feel better!

To make a bear hat of your own, follow the directions in my free Versatile Earflap Hat Pattern. I chose to make my entire hat including braids on the earflaps in one color, Vanna’s Choice yarn in Barley. Make the ears with an H hook according to the directions below for whichever size you are making. When the ears are completed, squish them in half, position them on the hat and sew in place.

Ears (make 2)

0-3 Month and 3-6 Month Sizes

  • Round 1: 6 Sc in a magic circle; do not join, use a stitch marker at the end of rounds if you need to. (6)
  • Round 2: 2 Sc in ea st around; do not join. (12)
  • Round 3: * 2 Sc in next st, sc in next 5 sts * repeat around; do not join. (14)
  • Round 4: Sc in each st around; do not join. (14)
  • Round 5: * Sc2tog, sc in next st, sc2tog, sc in next 2 sts * repeat around. (10) Sl st in next st and fasten off, leaving a long tail for sewing the ear to the hat.

6-12 Month and Toddler Sizes

  • Round 1: 6 Sc in a magic circle; do not join, use a stitch marker at the end of rounds if you need to. (6)
  • Round 2: 2 Sc in ea st around; do not join. (12)
  • Round 3: Sc in next 2 sts, * 2 sc in next st, sc in next st * repeat around; do not join. (17)
  • Round 4: Sc in each st around; do not join. (17)
  • Round 5: Sc2tog, sc in next 7 sts, sc2tog, sc in next 6 sts around; do not join. (15)
  • Round 6: * Sc2tog, sc in next 3 sts * repeat around. (12) Sl st in next st and fasten off, leaving a long tail for sewing the ear to the hat.

Child and Teen/Adult Sizes

  • Round 1: 6 Sc in a magic circle; do not join, use a stitch marker at the end of rounds if you need to. (6)
  • Round 2: 2 Sc in ea st around; do not join. (12)
  • Round 3: * 2 Sc in next st, sc in next st * repeat around; do not join. (18)
  • Round 4: * 2 Sc in next st, sc in next 8 sts * repeat around; do not join. (20)
  • Round 5-6: Sc in each st around; do not join. (20)
  • Round 7: * Sc2tog, sc in next 8 sts * repeat around; do not join. (18)
  • Round 8: * Sc2tog, sc in next 4 sts * repeat around. (15) Sl st in next st and fasten off, leaving a long tail for sewing the ear to the hat.

Bonus – you can make some pretty cute Valentines with this hat too! Hope you love it and if you have any questions, please leave a comment or email me at email hidden; JavaScript is required.

TweetHeart Hat

As everyone well knows, Valentine’s Day is right around the corner. I wanted to make a couple different Valentine’s hats with my free Versatile Earflap Hat Pattern, but I have also been wanting to make some fun animal hats. I guess the animal won for now, but this bird still has a cute heart-shaped beak for a little Valentine’s touch (I couldn’t help myself).

To make this hat you should follow the directions in my Versatile Earflap Hat Pattern available for download here. Make the entire hat and both edgings in the same color. Add tassels in the same color to the earflaps (or braids or whatever you like), and I knotted some strands of yarn to the top of the hat for a little tuft of hair.

Follow the directions below to crochet the eyes and beak using worsted weight yarn and a G hook, and then sew them to the hat. I prefer to use 1/2″ buttons for the pupils, but if you are looking for an alternative to using buttons, you can always cut small circles from felt and sew them on, or you could make six single crochet in a magic circle, join with a slip stitch and then sew that on.

Eyes (make 2)

0-3 Month, 3-6 Month and 6-12 Month Sizes

  • Round 1: Ch 3, 2 sc in the 2nd ch from hook, 3 sc in next ch, working on the other side of the chain sc in next ch; do not join, use a stitch marker if you need to. (6)
  • Round 2: 2 Sc in ea st around; do not join. (12)
  • Round 3: 2 Sc in next 3 sts, sc in next 3 sts, 2 sc in next 3 sts, sc in next 3 sts; ch 1, skip next st and sl st in next st. (18) Fasten off, leaving a long tail for sewing the eye to the hat.

Toddler, Child and Teen/Adult Sizes

  • Round 1: Ch 3, 2 sc in the 2nd ch from hook, 3 sc in next ch, working on the other side of the chain sc in next ch; do not join, use a stitch marker if you need to. (6)
  • Round 2: 2 Sc in ea st around; do not join. (12)
  • Round 3: 2 Sc in next 3 sts, sc in next 3 sts, 2 sc in next 3 sts, sc in next 3 sts; do not join. (18)
  • Round 4: Sc in next 2 sts, 2 sc in next st, sc in next st, 2 sc in next st, sc in next 6 sts, 2 sc in next st, sc in next st, 2 sc in next st, sc in next 4 sts; ch 1, skip next st and sl st in next st. (22) Fasten off, leaving a long tail for sewing the eye to the hat.
Heart Beak

All Sizes

  • Row 1: Ch 2, sc in 2nd ch from hook; ch 1 and turn. (1)
  • Row 2: 3 sc in next st; ch 1 and turn. (3)
  • Row 3: (Hdc, dc) in next st, ch 1, sl st in next st, ch 1, (dc, hdc) in next st, ch 1, sl st in same st. Fasten off, leaving a long tail for sewing the beak to the hat.

If you have any questions, please don’t hesitate to leave a comment or send me an email at email hidden; JavaScript is required. Now go have fun crocheting hats for all the “tweethearts” in your life!

Crochet Football Applique Hat

We are still in football mode here at our house, so we decided to make more football hats this week, this time with more team spirit. Now we are ready to cheer for either team in the Super Bowl (although these little guys will be snug in their beds by then).

To make these hats, I followed the color changes suggested in the Striped Band Hat version of my free Versatile Earflap Hat Pattern. I added tassels to the earflaps and sewed on a crocheted football applique. This cute applique is available for free from the Speckled Frog Crochet blog. It is really quick and easy to make, and it adds an extra special touch to the hat.

I hope you found this useful, and if you have any questions at all, feel free to leave a comment or you can email me at email hidden; JavaScript is required. Thanks for stopping by and have a great week!

Crochet Football Hat Pattern

With only two weeks until Super Bowl 2012, I figured it would be a great time to use my free Versatile Earflap Hat Pattern to make a football hat. Please excuse the chin drool – someone is getting his 2-year molars. This may be why he wasn’t too cooperative of a model today LOL!

You can download the free pattern here, then reference below for where to add your white stripes. Finish the hat by lining up the earflaps to find the center, stitch a long, white line down the center front (I stitched a second line over the first), and then stitch several short marks across the long line. If you want a football hat with more team spirit, add braids, tassels or pom poms in your favorite team’s colors to the center of each earflap.

I used Loops and Threads Impeccable for this hat in a dark brown and white, but any similar weight (Aran/Worsted) yarn should work fine. I would probably try a lighter shade of brown and a creamier white the next time I make this hat, but for now I am trying to use yarn I have before buying more. Here is what I did to make this hat:

Child

  • Work rounds 1 through 7 in brown
  • Switch to white for rounds 8 & 9
  • Switch back to brown for rounds 10 through 15
  • Switch to white for rounds 16 & 17
  • Switch back to brown for round 18 and both earflaps
  • Work first and second edgings in brown


Other Sizes

These are my suggestions on where to change colors to get this same look on other size hats:

0-3 Months

  • Work rounds 1 through 4 in brown
  • Switch to white for round 5
  • Switch back to brown for rounds 6 through 9
  • Switch to white for round 10
  • Switch back to brown for round 11 and both earflaps
  • Work first and second edgings in brown

3-6 Months

  • Work rounds 1 through 4 in brown
  • Switch to white for round 5
  • Switch back to brown for rounds 6 through 10
  • Switch to white for round 11
  • Switch back to brown for round 12 and both earflaps
  • Work first and second edgings in brown

6-12 Months

  • Work rounds 1 through 5 in brown
  • Switch to white for round 6
  • Switch back to brown for rounds 7 through 11
  • Switch to white for round 12
  • Switch back to brown for round 13 and both earflaps
  • Work first and second edgings in brown

Toddler

  • Work rounds 1 through 5 in brown
  • Switch to white for rounds 6 & 7
  • Switch back to brown for rounds 8 through 12
  • Switch to white for rounds 13 & 14
  • Switch back to brown for round 15 and both earflaps
  • Work first and second edgings in brown

Teen/Adult

  • Work rounds 1 through 8 in brown
  • Switch to white for rounds 9 & 10
  • Switch back to brown for rounds 11 through 17
  • Switch to white for rounds 18 & 19
  • Switch back to brown for round 20 and both earflaps
  • Work first and second edgings in brown

I hope you found this useful, and if you have any questions at all, feel free to leave a comment or you can email me at email hidden; JavaScript is required. Thanks for stopping by and have a great week!

Striped Band Hat

My oldest son, J., loves to model my hats, especially when it involves a trip to the playground, candy or another fun treat. He loves to be a goofball and gives me lots of funny faces.

Despite his love to model my hats, when it is time to go out in the cold, J. still chooses to wear the $5 hat his grandma bought him a few years ago. Silly boy.

This post is about his gray hat though, so I will now share the details on how to make one just like it. You can download the basic pattern here, and then keep reading on for the details.

I specifically chose these colors to go with J.’s favorite hoodie – Vanna’s Choice in Silver Grey (Color A) for the main hat, and stripes of Red Heart Super Saver in Teal (Color B) and Vanna’s Choice in Mustard (Color C). I will just refer to color A, color B and color C from here on out so that you can substitute whatever colors you like. Here is what I did:

Child

  • Work rounds 1 through 13 in color A
  • Switch to color B for round 14, switch to color C for round 15, switch to color B for round 16, switch to color C for round 17
  • Switch back to color A for round 18 and both earflaps
  • Work first and second edgings in color A
  • Add a tassel of colors B & C to the center of each earflap

Other Sizes

These are my suggestions on where to change colors to get this same look on other size hats:

0-3 Months

  • Work rounds 1 through 6 in color A
  • Switch to color B for round 7, switch to color C for round 8, switch to color B for round 9, switch to color C for round 10
  • Switch back to color A for round 11 and both earflaps
  • Work first and second edgings in color A
  • Add a tassel of colors B & C to the center of each earflap

3-6 Months

    • Work rounds 1 through 7 in color A
    • Switch to color B for round 8, switch to color C for round 9, switch to color B for round 10, switch to color C for round 11
    • Switch back to color A for round 12 and both earflaps
    • Work first and second edgings in color A
    • Add a tassel of colors B & C to the center of each earflap

6-12 Months

      • Work rounds 1 through 8 in color A
      • Switch to color B for round 9, switch to color C for round 10, switch to color B for round 11, switch to color C for round 12
      • Switch back to color A for round 13 and both earflaps
      • Work first and second edgings in color A
      • Add a tassel of colors B & C to the center of each earflap

Toddler

      • Work rounds 1 through 10 in color A
      • Switch to color B for round 11, switch to color C for round 12, switch to color B for round 13, switch to color C for round 14
      • Switch back to color A for round 15 and both earflaps
      • Work first and second edgings in color A
      • Add a tassel of colors B & C to the center of each earflap

Teen/Adult

      • Work rounds 1 through 15 in color A
      • Switch to color B for round 16, switch to color C for round 17, switch to color B for round 18, switch to color C for round 19
      • Switch back to color A for round 20 and both earflaps
      • Work first and second edgings in color A
      • Add a tassel of colors B & C to the center of each earflap

I hope you found this useful, and if you have any questions at all, feel free to leave a comment or you can email me at email hidden; JavaScript is required. Thanks for stopping by and have a great week!

One Stripe Hat

This is my youngest, L.

I think he is pretty cute, but he doesn’t make it into too many of my photos because he is usually just a blur. That is starting to change and I am so happy!

Today I thought I would share the details of how to make a one stripe hat just like L’s. You can download the basic pattern here, and then keep reading on for the details.

The colors for this hat were inspired from L’s favorite googly-eyed lizard hoodie. I used Vanna’s Choice in Pea Green (color A) for the main hat and Charcoal (Color B) for the stripe. I will just refer to color A and color B from here on out so that you can substitute whatever colors you like. Now L. is only two and a half, but he is a big guy so I always make him child size hats. Here is what I did:

Child

  • Work rounds 1 through 13 in color A
  • Switch to color B for rounds 14 through 16
  • Switch back to color A for rounds 17 & 18 and both earflaps
  • Work first edging in color A
  • Work second edging in color B

Other Sizes

I haven’t made this one stripe hat in any other sizes yet, but here are my suggestions on where to change colors to get the same look:

0-3 Months

  • Work rounds 1 through 8 in color A
  • Switch to color B for rounds 9 & 10
  • Switch back to color A for round 11 and both earflaps
  • Work first edging in color A
  • Work second edging in color B

3-6 Months

  • Work rounds 1 through 8 in color A
  • Switch to color B for rounds 9 & 10
  • Switch back to color A for rounds 11 & 12 and both earflaps
  • Work first edging in color A
  • Work second edging in color B

6-12 Months

  • Work rounds 1 through 9 in color A
  • Switch to color B for rounds 10 & 11
  • Switch back to color A for rounds 12 & 13 and both earflaps
  • Work first edging in color A
  • Work second edging in color B

Toddler

  • Work rounds 1 through 10 in color A
  • Switch to color B for rounds 11 through 13
  • Switch back to color A for rounds 14 & 15 and both earflaps
  • Work first edging in color A
  • Work second edging in color B

Teen/Adult

  • Work rounds 1 through 14 in color A
  • Switch to color B for rounds 15 through 17
  • Switch back to color A for rounds 18 through 20 and both earflaps
  • Work first edging in color A
  • Work second edging in color B

I hope you found this useful, and if you have any questions at all, feel free to leave a comment or you can email me at email hidden; JavaScript is required. Thanks for stopping by and have a great week!

Free Pattern: Versatile Earflap Hat Pattern

Here is an easy pattern for a versatile earflap hat. The best part – it’s free! It is made with #4 Worsted/Aran weight yarn and the pattern includes sizes for newborn through adult. There are so many different things you can do with this pattern, and I’m planning on sharing many ideas throughout the year so stay tuned.

If you like this pattern, sign up for my free monthly newsletter to be notified of other free pattern releases.

Hat Pictures


Crochet Stool Cover

A few years ago my husband and I bought a couple plain counter-height stools for some space-saving seating in our kitchen. They have definitely served their purpose over the years, but they are not very comfortable and they certainly leave something to be desired style-wise. I decided it was time for some DIY.

The pattern for this stool cover is very simple and easy to follow. It probably takes longer to prepare your fabric yarn than it takes to crochet. I used some knit fabric I had purchased, but this would also be a great project for recycling unwanted t-shirts or knit sheets.

Supplies

  • 2.5 Yards of 58 inch wide Knit Fabric, cut into 3 inch stips
  • Fabric Scissors
  • Size Q (15.75mm) Hook
Notes
  • Check out these tips for making fabric yarn.
  • There really isn’t an accurate gauge for this pattern considering different fabric weights. You will need to experiment a little to see what will work best for you.
  • The seat I covered was 12 inches in diameter.
  • You may need to increase by more or less rows depending on your seat diameter and the weight of your fabric.
  • Pattern is worked in continuous rounds. Do not join at the end of each round.
Pattern

Round 1: 6 Sc in a Magic Circle. (6)
Round 2: 2 Sc in ea st around. (12)
Round 3: * Sc in next st, 2 sc in next st * repeat around. (18)
Round 4: * Sc in next 2 sts, 2 sc in next st * repeat around. (24)
Round 5: * Sc in next 3 sts, 2 sc in next st * repeat around. (30)
Round 6: * Sc in next 4 sts, 2 sc in next st * repeat around. (36)
Round 7: Sc in ea st around. (36)
Round 8: * Sc in next 4 sts, sc2tog * repeat around. (30)
Round 9: * Sc in next 3 sts, sc2tog * repeat around. (24)
Slst in next st and tie off. Tuck the end inside the cover and stretch around the seat of your stool.

Stool Cover Pictures

Free Pattern: Summer Squares Beach Tote


Here is a free pattern for a fun tote bag that is perfect for taking to the beach or pool. The main portion of the bag features a square mesh pattern that will allow wet towels and swimsuits to breathe. It is also great for carrying toys, sunscreen and beach reads. This crochet pattern is fairly easy and quick to work up. I hope you will enjoy it!

If you like this pattern, sign up for my free monthly newsletter to be notified of other free pattern releases.

Beach Tote Pictures

Free Pattern: Mug Coaster Cozy

Protect your hands from a hot mug and your table from scratches with a cute mug coaster cozy. Using only single crochet stitches, this easy crochet pattern works up quickly and makes a great little gift.

If you like this pattern, sign up for my free monthly newsletter to be notified of other free pattern releases.

Mug Cozy Pictures