I love learning new crochet techniques and incorporating them into my designs. Recently I have discovered the Magic Circle technique for starting crochet projects in the round. I love this method because it allows you to completely close the starting round of your project so that there is no unsightly hole in the top. Follow the steps below!
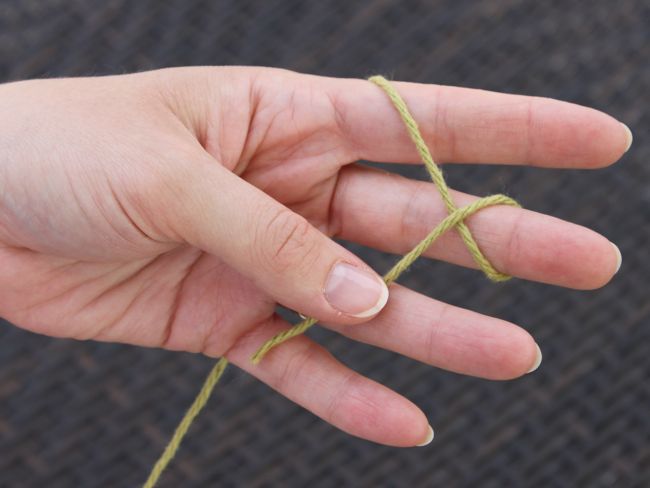
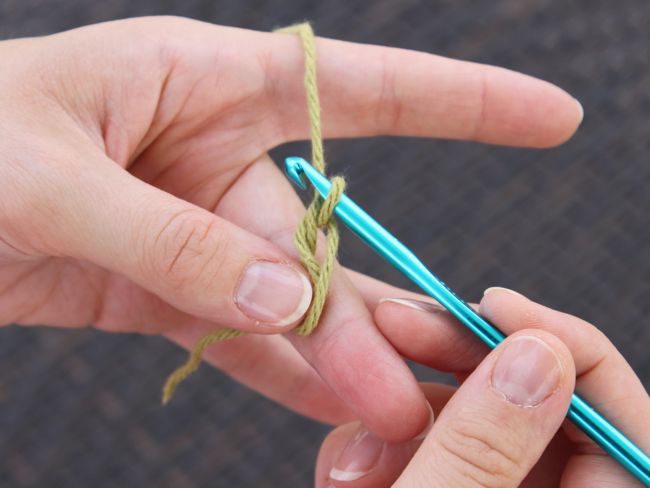
Step 1: Wrap yarn around your middle finger, forming an “X.”
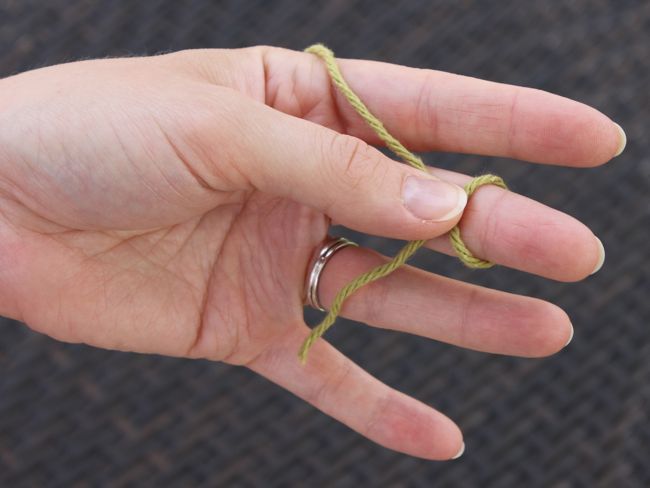
Step 2: Place your thumb over the “X.”
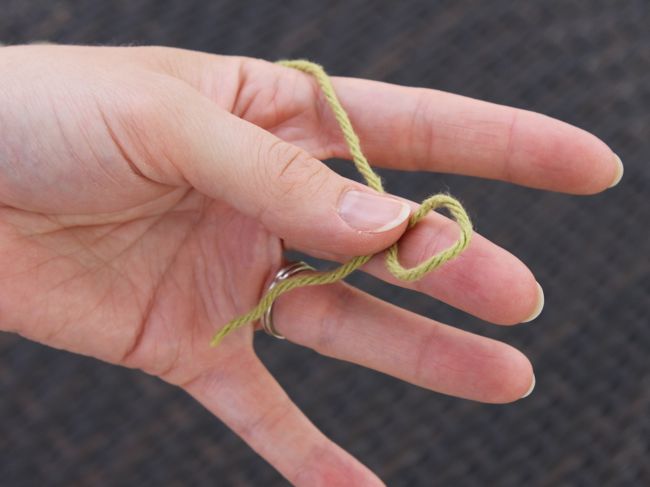
Step 3: Slide loop off the end of your middle finger, still pinching the “X” between your thumb and middle finger.
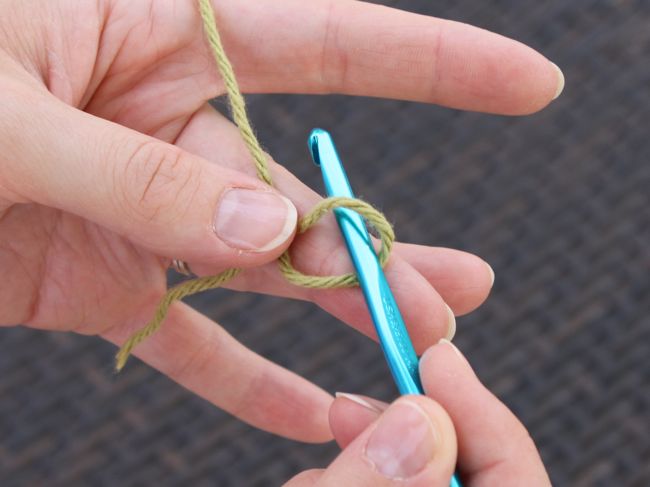
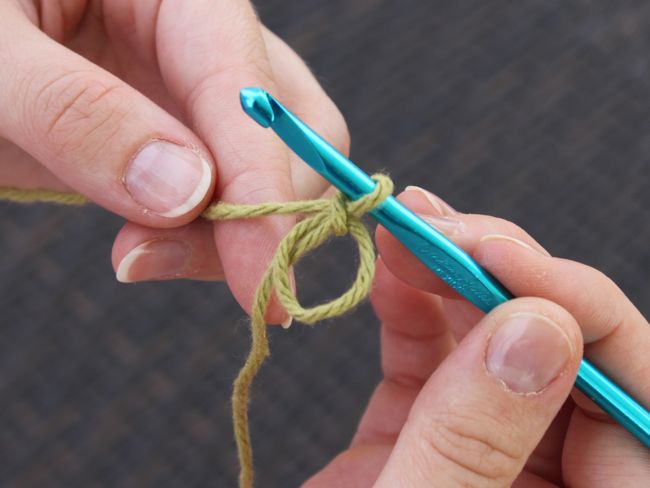
Step 4: Insert hook through the circle.
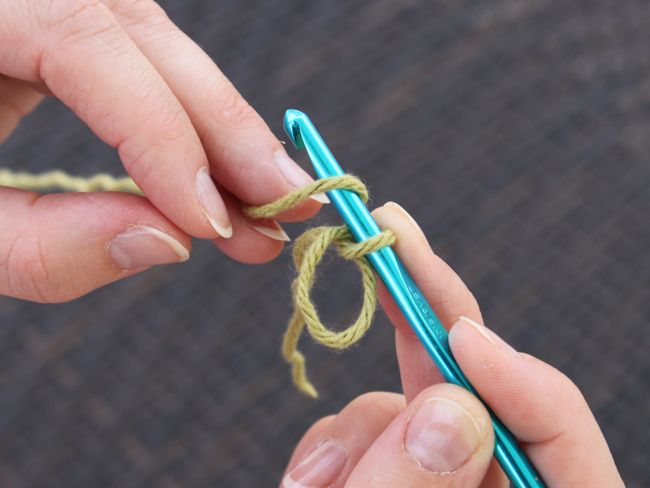
Step 6: Yarn over and draw through the loop on your hook.
If your pattern calls for sc, you are ready to go. If your pattern calls for hdc (or dc), you will need to ch 2 (or 3) at this point. Do not count this ch 2 (or ch3) as a stitch.
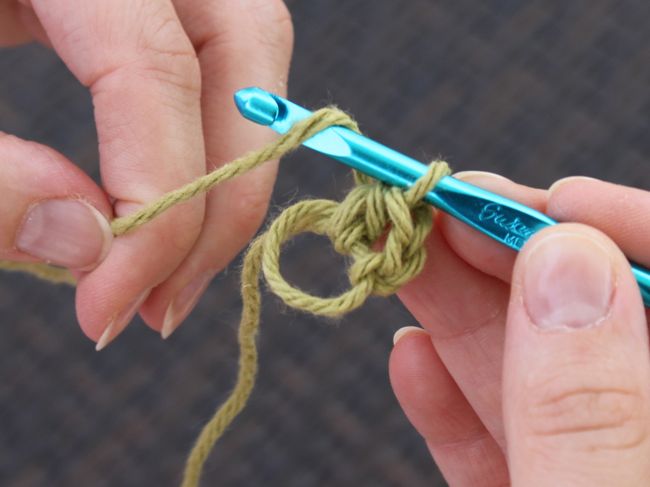
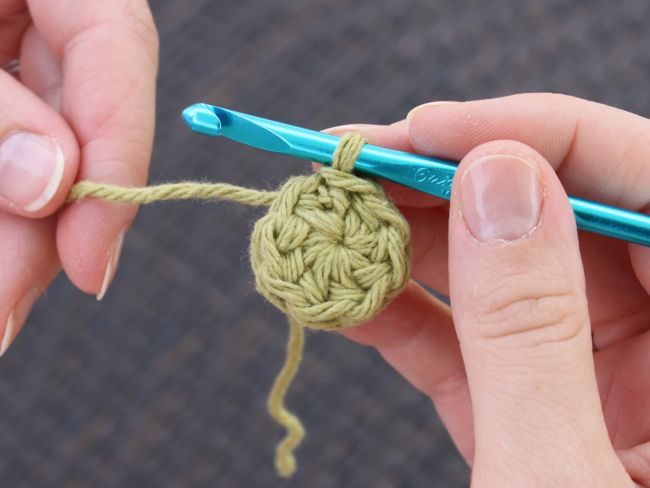
Step 7: Complete the number of stitches required for your pattern. Crochet both through the circle and over your loose yarn end. (This example shows hdc in a magic circle.)
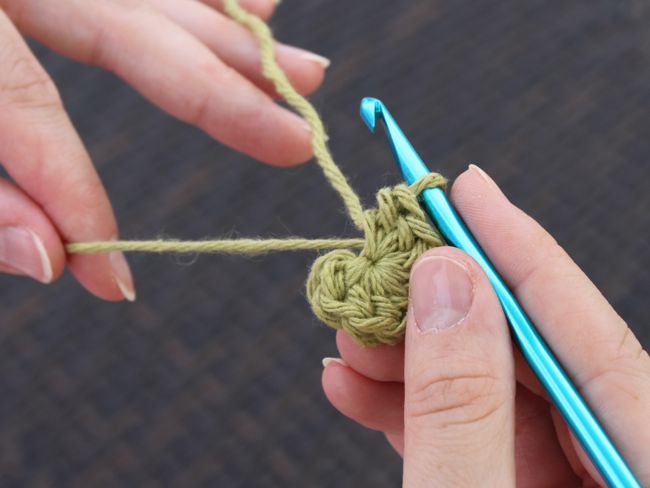
Step 8: Pull loose yarn end to tighten circle. Make sure you weave in this yarn end securely as you are finishing your project so that it will not unravel.





I am having a hard time crocheting my hdc into the magic circle. The pattern calls for 11 hdc in a magic ring. Do I crochet 11 single stitches when you say to crochet 2 or 3?
You should follow the steps exactly up to step 6, then chain one more. You will have your magic circle and a chain of 2 (abbreviated ch 2). Then you want to work your 11 hdc in the magic ring as illustrated in step 7 (the illustration only has one hdc and the ch 2). Once you complete the 11 hdc, pull the circle closed as in step 8. I hope this helps!
This is the BEST tutorial EVER for a Magic Circle!
Thank you so much!
Thank you for such an easy method to do the magic circle. YOUR method is the least confusing of all I have looked at.
Thank you, Sandy! I’m glad I could present it in a clear way that will be easy to understand. I love the result of this method so much that I always encourage others to use it too 🙂
I agree. This is the best showing of a magic circle I have seen. I did not get it before. Now I do!
Thank you!
This is very easy to follow
Yup! Must agree! Thanks for the great pictures and good and east steps. Though I must say, my ring looks…. misshapen…
This is WONDERFUL!! I have watched youtube tutorials on this and still had trouble….. I had no problem doing it with your tutorial! Thank you so much!
Thank you, Sarah! I’m so glad it worked for you!!
I have been doing crochet for 50years and never heard of this Magic Circle.It gives a lovely finishto the top of a hat.Thank you.
Isn’t it great?!? Changed my crochet life when I learned it LOL 🙂
Hi! My question isn’t about the magic circle…but I wasn’t sure where to put my question! 🙂 I think I have a problem when it comes to connecting the row. I’m working on a teen/adult hat and I’m to have 68 stitches. Do the ch2 count as one stitch? So really I would have 67 stitches and then the ch 2 makes the 68th?
I seem to be able to do the increasing rows okay, but when I do the continuous circle I get a little extra bump where I am connecting the rows. Like maybe I am adding extra stitches somehow!
Any ideas?! 🙂
Hi! The ch 2 does count as a stitch, so yes you will have 67 stitches plus the ch 2. I will send a picture of what my seam looks like to your email address later today so you can compare it to yours. I think joining seams always look noticeable and I usually design my patterns without joining whenever possible. However, I wanted to keep that pattern “versatile” and the joins are necessary if you want to change colors to make stripes.
I just love this! How clever! Thank you so much!
Thanks, Michele! I start all my projects in the round with this method – I love it too!
I enjoyed reading the tutorial on the magic ring.I am trying the beach tote bag and found the tips great. I will enjoy making the beach tote bag.
Thanks, Emily! I’m glad you found the tips useful!
Hi,
I am working on your versatile ear flap hat… loving it.
Problem lies when I come to the ear flap part. On the last row of hat and 1st row of ear flap, you do not say turn so I didn’t. I slip stitched the appropriate amount for the size I am working on. So I have my hat then I did the slip stitching ( i am thinking this was to “travel” to where I needed the ear flap also having the ear flap be away from the “notorious” connection bump) then the ear flap rows. Now I have from last stitch of hat row to the ear flap this sl st row of 11 then to the left of it the rows for the ear flap. Didn’t look right but I kept at it. ( my mom used to tell me in sewing, don’t get ahead of yourself and just follow through)
So now I am to start ear flap 2. Holding the hat upside down putting ear flap to my left… count 26 stitches over to the right. Attach yarn, sc in the same and next 9. continue with rows 2 -7….
I am thinking, am i supposed to turn after the 11 sl sts and ch1? If so, then why specify sc in same st?
When I count 26 stitches to the right, attach yearn, sc in the same st and in next 9 sts I have stitches between that and those slip stitches… this is when I count from the left most stitch of the ear flap or from the first stitch to the right of the ear flap…
Should I just be ignoring that little ch1 bump of the begining of the sl stitches? Like maybe it will blend when I do the edging?
I am so confused I am even more confused trying to read what I just wrote to explain my dilemma lol Okay I have read and reread what I have written, coming up with more questions every time… going to hit send… I am sure I have made this way more complicated than it really is
LOL I find crochet so much more confusing the more it is written out and explained! 🙂 It sounds like you did the first earflap correctly. You DO NOT want to turn after the 11 sl sts and ch 1, but rather continue working to the left. Only turn when it says to do so.
So for the second earflap, hold the hat upside down and, with your 1st earflap on the left, count to the right (from the right edge of the 1st earflap) 26 sts. Breaking it down, 11 sts will take you back to your joining seam, and 15 more (totaling 26) will take you to where you want to attach for the 2nd earflap. Sc in that st and the next 9, working to the left, back toward the 1st earflap. Then ch and turn, continuing with rows 2-7. If I am doing my math correctly, there should be approximately 16 stitches between the earflaps in the back of the hat (where the joining seam runs down the hat).
Hope this helps, but feel free to ask more questions if you need!
Wow! Thanks. So many times I’d read a tutorial or watch a video and my eyes would glaze over. =) Just couldn’t seem to understand what they were saying. THANK you. You made it so clear!
And, I love your spam protection too. Much better than those scrolly, scrunched together words that I can’t read.
Thank you! I think everyone should learn this – I’m glad I could make it easy 🙂
Dear Micah,
I am working on making the apple hat, and i was wondering I dont quite understand how I should do a few steps of the magic circle. I just started crocheting recently, so I don’t really understand all of the terms. I understand what to do in the magic circle up to step 5, but then after that I got lost. I was just wondering if there was any other way to explain it?
Thank you!
-Ember Sessler
Hi Ember! I know there are some videos on YouTube of making a magic circle (or adjustable ring) if you think watching someone make it might help. They might have a different explanation than me also that may make more sense to you. Alternately, if you would rather bypass the magic circle for that hat, you could ch 3 and then hdc in the 3rd ch from the hook 7 times.
I have never been able to get magic circles but now i do. Thanks!
This is so clear!