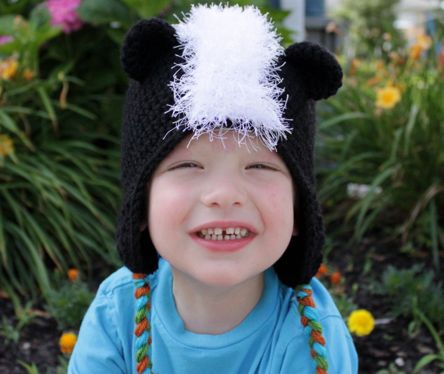
Look at that little stinker – isn’t he cute?!
Another fun hat you can make with my free Versatile Earflap Hat Pattern is a skunk. Simply follow the instructions for the size you would like to make completely in black yarn, then follow the additional instructions below.
White Stripe
Here is a little illustration for how I made the fuzzy white stripe for my skunk hat. First decide how wide you would like your stripe to be. For this child size hat, I made the stripe 8 stitches wide.
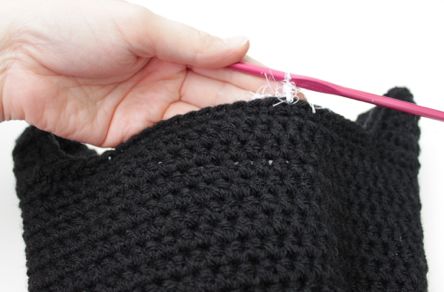
Holding the hat upside down with the front facing you, attach your yarn so that your stipe will be centered across the front of the hat. I used Lion Brand Fun Fur (but any eyelash or fuzzy yarn should work fine) and an I hook.
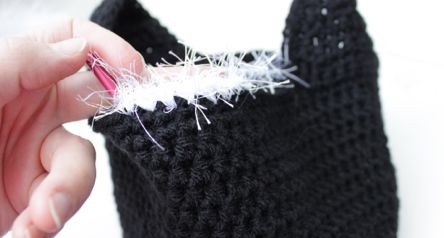
Sc across the front of the hat as wide as you want your stripe. Then chain 1 and turn your work.
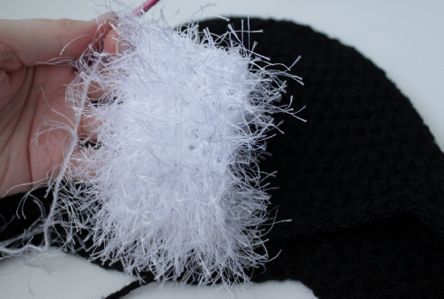
* Sc across, ch 1 and turn* Repeat until…
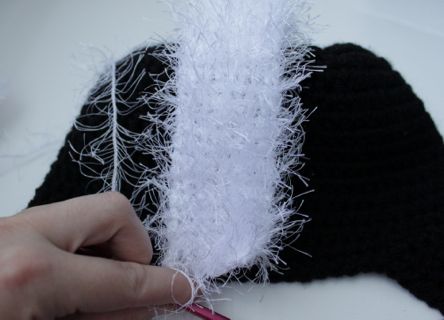
…the stripe can flip over the top and meet the back edge of the hat. Fasten off and sew the end of the stripe to the center back edge. At this point I also tacked the stripe to the hat with a stitch every inch or so along both edges of the stripe. You can do this or just leave it – whatever you want.
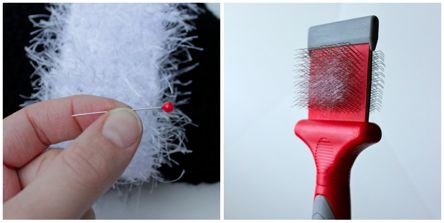
Next I tried to fluff up the Fun Fur a little. There are two ways I like to do this. One way is to use a sewing pin to pull up some of the fur that gets caught in the stitches, and the other way is to lightly brush the stripe with a clean wire pet brush (I swear the white fuzz in the picture is yarn from my fluffy cloud pom poms and not from a pet).
Ears (make 2)
Making the ears is next. Use your black yarn and an H hook. When the ears are completed, squish them in half, position them on the hat and sew in place.
0-3 Months, 3-6 Months and 6-12 Month Sizes
- Round 1: 6 Sc in a magic circle; do not join, use a stitch marker at the end of rounds if you need to. (6)
- Round 2: 2 Sc in ea st around; do not join. (12)
- Round 3: * 2 Sc in next st, sc in next 3 sts * repeat around; do not join. (15)
- Round 4:Â Sc in each st around; do not join. (15)
- Round 5: * Sc2tog, sc in next 3 sts * repeat around; do not join. (12)Sl st in next st and fasten off, leaving a long tail for sewing the ear to the hat.
Toddler, Child and Teen/Adult Sizes
- Round 1: 6 Sc in a magic circle; do not join, use a stitch marker at the end of rounds if you need to. (6)
- Round 2: 2 Sc in ea st around; do not join. (12)
- Round 3: * 2 Sc in next st, sc in next st * repeat around; do not join. (18)
- Round 4-5: Sc in each st around; do not join. (18)
- Round 6: * Sc2tog, sc in next 4 sts * repeat around. (15) Sl st in next st and fasten off, leaving a long tail for sewing the ear to the hat.
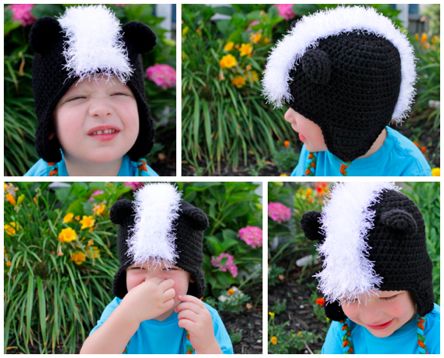
If you choose, add some braids, tassels or pom poms to the earflaps on your hat and you are done! Thanks for stopping by today and make sure to check back midweek for the newest release in my pattern store – the Safari Helmet Pattern.




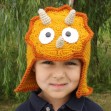





Thank you so much for this pattern. I made it for my 11 year old daughter who is a skunk lover. I did add pink to the inside of the ears to make it a little girly. She loves it. 🙂
Sounds adorable, Tamy! I’m so happy you like the pattern 🙂